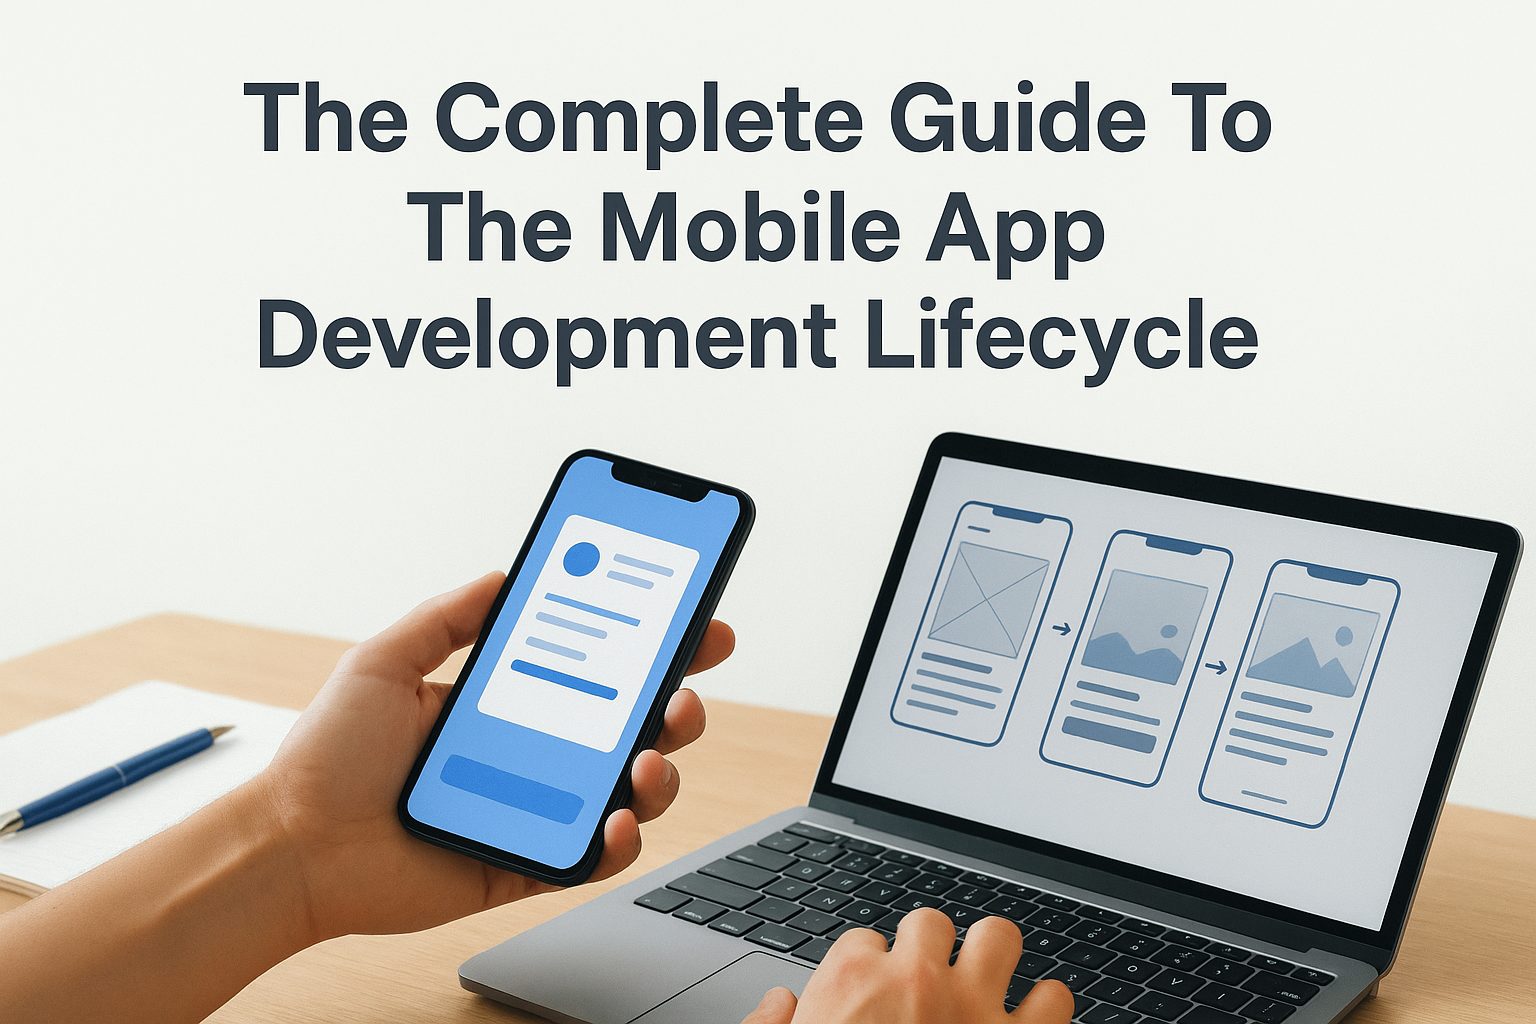
The Complete Guide To The Mobile App Development Lifecycle
Every successful app, the ones people actually use and keep on their phones, follows a structured path from idea to launch and beyond. That path is the mobile app development lifecycle, and understanding it is the difference between building something users love and burning through your budget on a product that never gains traction. Whether you’re a startup founder with a first-time concept or an enterprise team planning a major rollout, knowing what happens at each stage gives you control over timelines, costs, and outcomes.
The lifecycle covers everything from early ideation and requirements gathering through design, development, testing, deployment, and post-launch maintenance. Skip a phase or rush through it, and problems compound downstream. A missed requirement in planning becomes a costly redesign in development. An untested edge case becomes a one-star review on launch day. Each stage exists for a reason.
At Tetra Technology, we’ve guided clients through this process across 200+ completed projects over more than a decade of app and software development. We’ve seen what works, what breaks, and where teams most often lose time and money. This guide walks you through every phase of the mobile app development lifecycle, what happens, why it matters, and how to get it right. By the end, you’ll have a clear roadmap for turning your app idea into a product that’s built to last.
Why the mobile app development lifecycle matters
A defined process isn’t bureaucracy for its own sake. When you follow the mobile app development lifecycle, you give every team member, stakeholder, and decision-maker a shared map of where the project stands, what comes next, and what’s at stake if something slips. Without that shared understanding, conversations about scope, cost, and delivery dates become guesswork, and guesswork is expensive.
A structured lifecycle turns abstract ideas into concrete deliverables at each stage, which makes it far easier to catch problems early and course-correct before costs spiral.
Structure reduces risk at every stage
Building an app involves dozens of decisions that directly affect each other. The database architecture you choose in development depends on the data requirements you captured during planning. The UI components your designers create depend on the user flows defined in research. When you treat these phases as connected and sequential rather than isolated tasks, you avoid the situation where a late-stage discovery forces you to rewrite work you thought was finished.
Most app failures trace back to a breakdown in process, not a shortage of talent or budget. Teams that skip requirements gathering ship features users never asked for. Teams that skip testing ship bugs that erode trust on day one. Treating each phase as non-negotiable keeps everyone accountable to a sequence that has been proven to reduce rework and the compounding costs that follow.
Budget and timeline predictability
One of the most practical reasons to follow a defined lifecycle is what it does for your project estimates. When you know exactly what each phase involves and what it produces, you can price each stage accurately and set realistic delivery dates. Scope creep, the main cause of projects running over budget, is much harder to introduce when stakeholders have agreed upfront to defined deliverables at each phase gate.
Companies that skip formal lifecycle management routinely find themselves months into a build with no clear answer on when it will ship or what it will cost to finish. That uncertainty affects your ability to plan marketing timelines, allocate team resources, and make commitments to customers or investors. A disciplined process gives you numbers you can actually rely on.
Alignment across teams and stakeholders
Apps rarely get built by one person. You typically have product managers, designers, developers, QA engineers, and business stakeholders all contributing at different points. The lifecycle gives each group a clear entry point and a clean handoff. Designers know not to finalize visuals until research is complete. Developers know not to write production code until designs are approved. Each stakeholder understands what questions to answer and when, rather than getting pulled into every conversation throughout the entire build.
That alignment has a direct effect on speed. When handoffs are clean and expectations are established in advance, teams spend less time in meetings resolving confusion and more time building. The difference between a project that delivers on schedule and one that drags on for months is usually not technical skill. It’s whether the people involved shared a clear, agreed-upon process from the start.
Mobile app development lifecycle at a glance
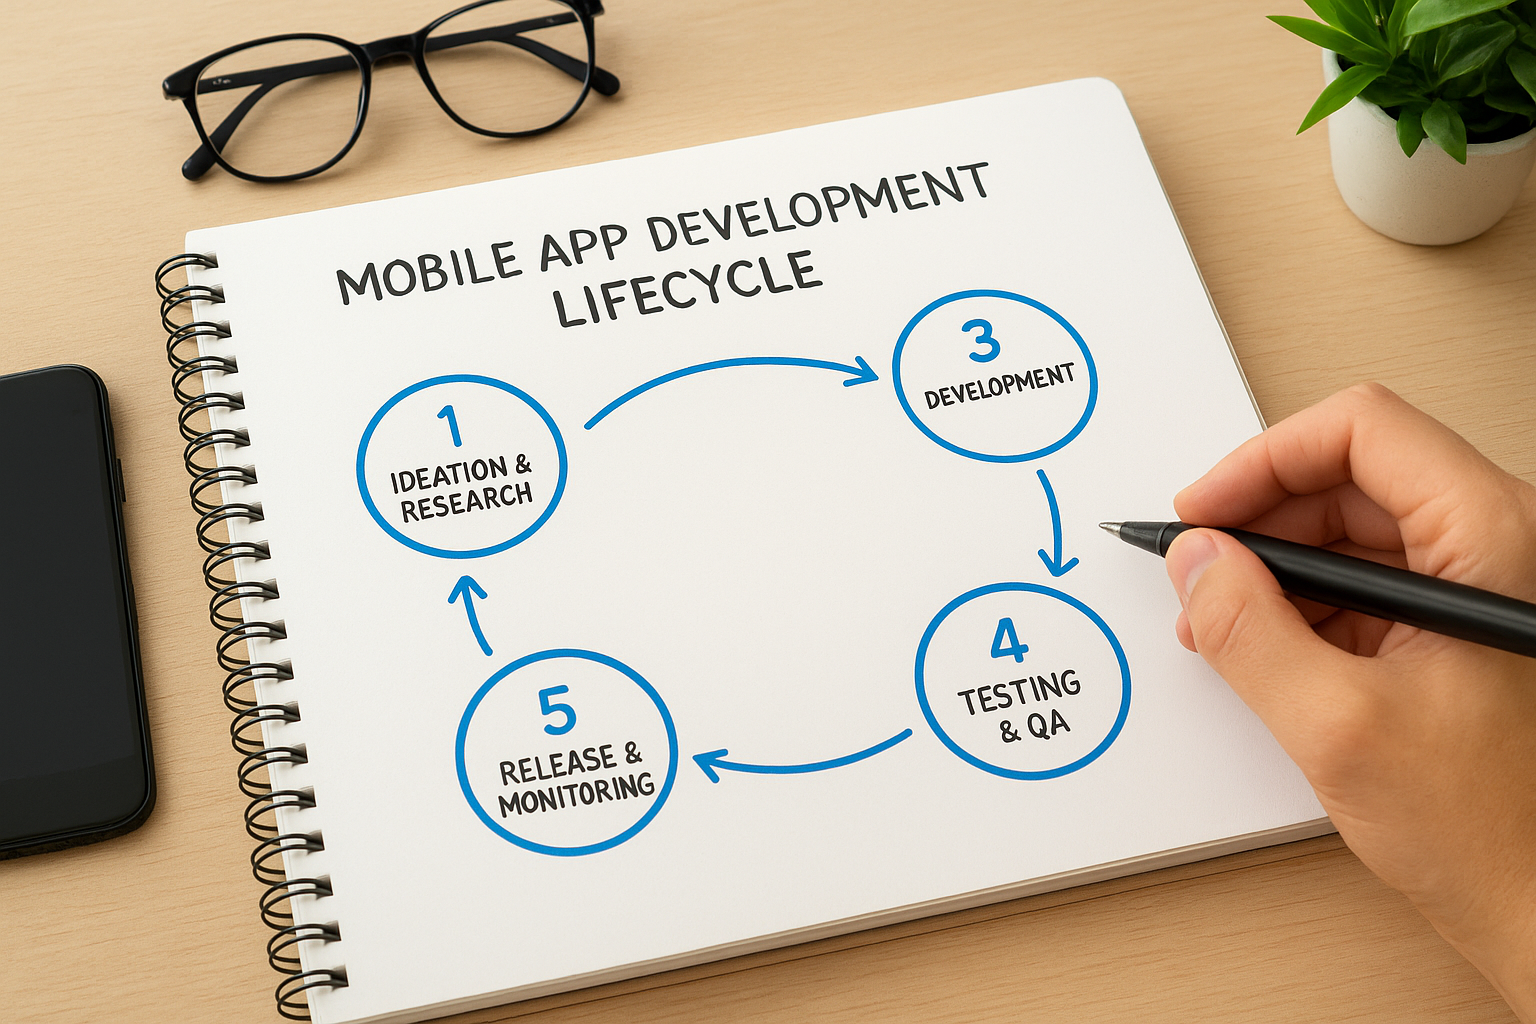
Before diving into each phase in detail, it helps to see the full mobile app development lifecycle laid out in one place. Each stage feeds into the next, and understanding the sequence gives you a clear picture of how a concept becomes a working product in users’ hands. There are five core phases that every serious app project moves through, regardless of platform, team size, or budget.
Skipping any phase doesn’t eliminate that work; it just pushes the consequences into a later stage where fixing them costs significantly more.
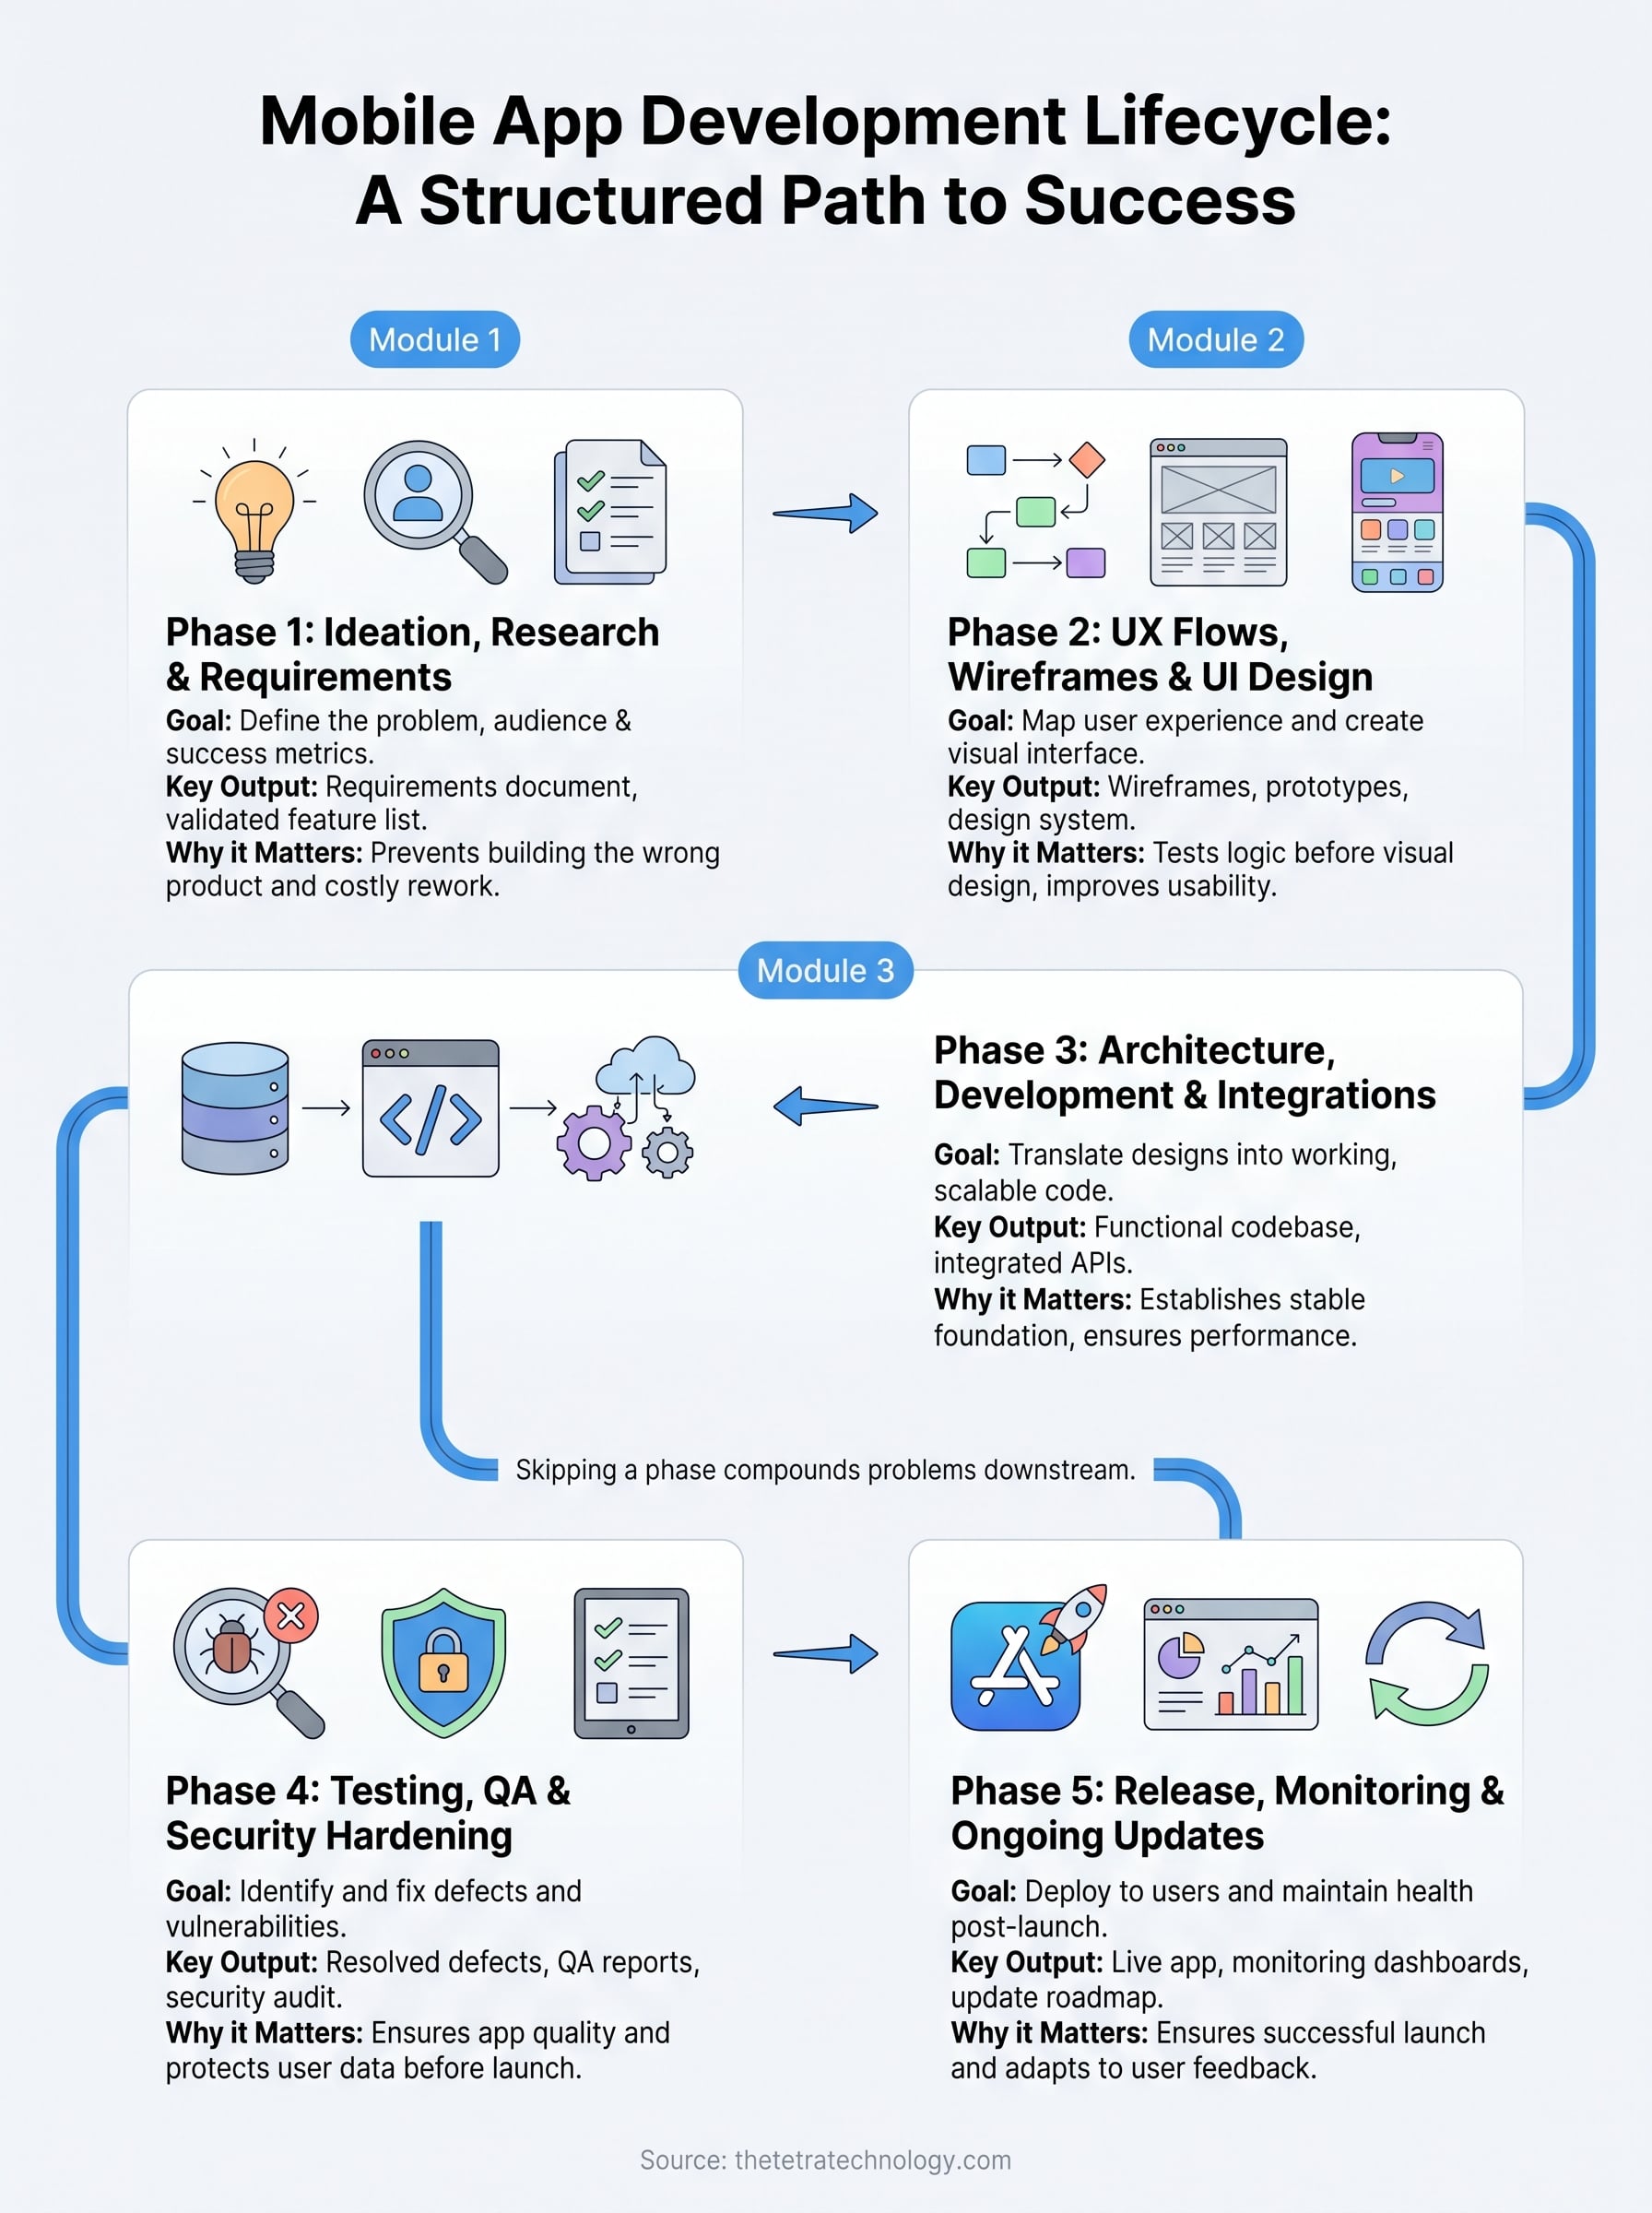
The five phases, briefly defined
Each phase has a specific goal, a set of deliverables, and a logical reason for sitting where it does in the sequence. The table below gives you a quick reference before the detailed breakdowns that follow.
| Phase | Primary Focus | Key Output |
|---|---|---|
| 1. Ideation, Research, and Requirements | Define the problem and what success looks like | Requirements document, feature list |
| 2. UX Flows, Wireframes, and UI Design | Map the user experience and visual interface | Wireframes, design system, prototypes |
| 3. Architecture, Development, and Integrations | Build the actual product | Working codebase, integrated APIs |
| 4. Testing, QA, and Security Hardening | Find and fix problems before users do | QA reports, resolved defects, security audit |
| 5. Release, Monitoring, and Ongoing Updates | Ship the product and keep it healthy | Live app, monitoring dashboards, update plan |
How the phases connect
The phases aren’t independent tasks you can reorder or run simultaneously without consequences. Each one produces outputs that the next phase depends on. Your design team needs finalized requirements before building accurate user flows, and your developers need approved designs before writing production code. That dependency chain is intentional, not arbitrary.
Decisions you make early carry forward through the entire project. A well-defined requirements document in Phase 1 reduces costly back-and-forth during development in Phase 3. A thorough QA process in Phase 4 reduces the number of emergency hotfixes you’re pushing out in the weeks after launch. Every phase protects the work that follows it, which is why each one gets its own dedicated breakdown in this guide.
Phase 1: ideation, research, and requirements
Phase 1 is where the mobile app development lifecycle officially begins, and it’s the phase most teams underinvest in. The goal here is not to brainstorm a list of features but to define the problem your app is solving and validate that the solution you’re planning actually addresses it. Teams that rush through this phase spend months building the wrong thing with complete technical precision.
Define the problem before you design the solution
Before writing a single specification, you need a clear answer to who this app is for and what problem it solves for them. That means talking to your target users, not just internal stakeholders. You’re looking for evidence that the pain point is real, frequent, and significant enough that people will download and keep an app to resolve it. Assumptions you don’t test here will cost you in every phase that follows.
Spending two weeks on user research in Phase 1 can save you months of rework in Phases 3 and 4.
Competitive analysis belongs here too. Reviewing existing solutions in your space tells you what users already tolerate, where those products fall short, and where there’s a genuine opening for what you’re building. This isn’t about copying competitors; it’s about understanding the landscape so your product enters it with a clear point of difference rather than a vague sense of being "better."
Turning research into a requirements document
Once you’ve validated the problem and mapped the competitive landscape, everything you’ve learned needs to be translated into a formal requirements document. This document defines the features you will build, the features you will not build in version one, the technical constraints you’re working within, and the success metrics you’ll use to evaluate the finished product. Without this document, every decision in Phase 3 becomes a negotiation rather than a reference check.
Your requirements document should also capture platform decisions (iOS, Android, or both), performance expectations, and any compliance or security requirements specific to your industry. The more detailed and specific this document is, the fewer surprises appear during development, and the easier it becomes to hold scope steady when stakeholders push for additions mid-build.
Phase 2: UX flows, wireframes, and UI design
Phase 2 is where your validated requirements from Phase 1 take their first visual form. The goal here is to map how users move through your app and define what they see at every step, before a single line of production code is written. Jumping straight into visual design without this groundwork produces interfaces that look polished but frustrate users because the underlying logic was never tested.
Map the user experience before designing the interface
UX flows are diagrams that show every path a user can take through your app, from landing on the home screen to completing a core task. Mapping these flows first forces your team to answer structural questions like how many steps a checkout takes, what happens when a user hits an error, and where they land after completing an action. These answers shape every design decision that follows.
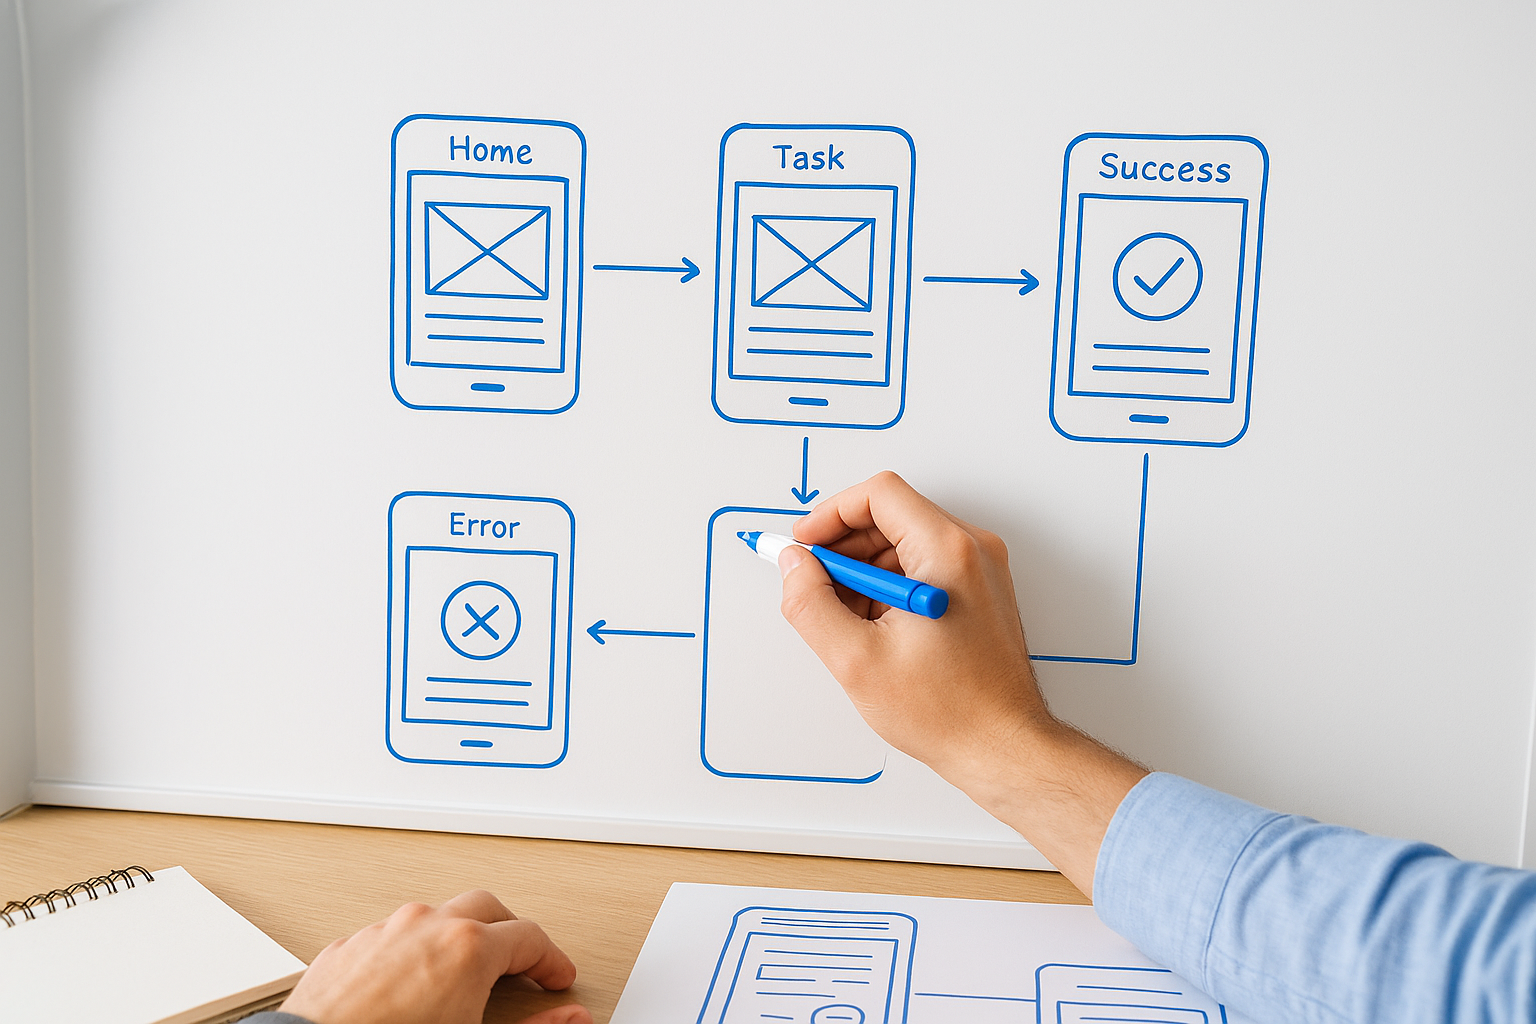
Defining your UX flows before opening any design tool prevents you from building screens that have no logical place in the actual user journey.
Wireframes come directly out of your UX flows. A wireframe is a low-fidelity layout that shows where each element sits on a screen without color, typography, or final imagery. Working in wireframes lets you test layout and hierarchy quickly, get stakeholder feedback on structure without debating visual style, and catch usability problems while changes are still cheap to make.
Building the visual layer
Once your wireframes are approved, your design team moves into high-fidelity UI design, where your brand identity, color system, typography, and component library come together into screens that reflect the finished product. This stage also produces a design system, a reusable set of components that keeps your interface consistent across every screen and speeds up the handoff to developers.
Prototyping is the final step in this phase of the mobile app development lifecycle. A clickable prototype lets real users interact with the design before development begins, surfacing friction points that even experienced designers miss in static mockups. Fixing a confusing navigation pattern in a prototype takes minutes; fixing it after a developer has built it takes days. The investment in a tested, approved prototype pays for itself before Phase 3 ever starts.
Phase 3: architecture, development, and integrations
Phase 3 is where your app moves from approved designs to working software. By the time your team reaches this point in the mobile app development lifecycle, every major decision about what to build and how it should look has been made. The work in this phase is about translating those decisions into a codebase that performs reliably, scales when demand grows, and connects cleanly to the external services your app depends on.
Choosing your technical architecture
Your architecture decisions determine how your app behaves under pressure and how easy it is to modify later. Before writing any production code, your engineering team needs to agree on the tech stack, data models, and system structure that will underpin everything else. Building on a poorly chosen architecture is like constructing a skyscraper on an unstable foundation; adding floors becomes progressively riskier the higher you go.
The architecture decisions you make at the start of Phase 3 are the hardest and most expensive to undo once development is underway.
Platform choice shapes your architecture directly. If you’re targeting both iOS and Android, your team needs to decide between native development and cross-platform frameworks like React Native or Flutter, weighing performance requirements against development speed and budget. Neither option is universally better; the right answer depends on what your requirements document from Phase 1 actually specifies.
Writing code and connecting services
With the architecture agreed upon, development begins in focused sprints where your team builds features incrementally and reviews progress against the approved requirements document. Working in short cycles rather than one long build keeps scope in check and surfaces integration problems before they stack on top of each other.
Most apps don’t function in isolation. They pull in third-party APIs, payment gateways, analytics platforms, and cloud services that need to be connected and tested as each is added. Microsoft Azure, Google Firebase, and similar platforms offer infrastructure services that handle authentication, storage, and real-time data sync at a level of reliability that would take months to replicate from scratch. Integrating these services correctly requires careful attention to authentication flows, error handling, and data formatting so your app behaves consistently when those external connections encounter delays or failures.
Phase 4: testing, QA, and security hardening
Phase 4 is the point in the mobile app development lifecycle where your team deliberately tries to break what it built. The goal is not to validate that things work under ideal conditions but to confirm that your app holds up under real-world use, including unexpected inputs, network failures, and determined bad actors attempting to exploit vulnerabilities. Everything you find here costs significantly less to fix than the same problem discovered after launch.
What your QA process needs to cover
Functional testing verifies that every feature behaves exactly as your requirements document specifies. Your QA team works through the full list of user flows, confirming that each one produces the correct output and that error states are handled gracefully rather than crashing the app or silently failing. Regression testing runs alongside this work, ensuring that fixing one bug does not quietly break something that was already working.

Performance testing belongs in this phase too. Your app needs to hold up under the load it will realistically face, which means testing response times, memory usage, and battery consumption across a range of devices and operating system versions. A feature that runs perfectly on the latest flagship device might time out or crash on mid-range hardware, and your target users are often on exactly those devices.
Skipping performance testing because everything worked fine on your development machine is one of the most consistent sources of negative app store reviews.
Security hardening before you ship
Security is not a feature you add at the end; it is a discipline you apply throughout development and verify rigorously in Phase 4. Your team should run penetration testing against authentication flows, API endpoints, and any screen that handles sensitive user data. Structured security checklists give your QA process a clear list of the vulnerabilities attackers most commonly target, so nothing gets overlooked before you submit to an app store.
Data encryption, secure token storage, and certificate pinning are baseline requirements for any app that handles user accounts or transactions. Confirming these controls are implemented correctly before release prevents the kind of security incident that destroys user trust and creates regulatory exposure. A clean security audit is one of the most valuable deliverables Phase 4 produces, and it gives every stakeholder a documented record that the product was hardened before it went live.
Phase 5: release, monitoring, and ongoing updates
Phase 5 is the final stage of the mobile app development lifecycle, but it is not the end of your responsibilities. Getting your app into the hands of users requires navigating app store submission requirements and building the operational habits that keep your product healthy long after launch day. Teams that treat release as the finish line instead of a transition point are the ones scrambling to respond to problems that a monitoring setup would have caught in minutes.
Getting your app through store review and into users’ hands
Submitting to the Apple App Store or Google Play is not a formality. Both platforms run review processes that check your app against defined policies, and a rejection at this stage delays your launch by days or longer. Preparing your submission package carefully, including screenshots, metadata, privacy disclosures, and accurate content ratings, reduces the chance of a rejection that could have been avoided with a checklist review before you submitted.
Staging your release to a small percentage of users first lets you catch performance issues at scale before they affect your entire audience.
Monitoring performance after launch
Once your app is live, real-time monitoring becomes your most important feedback channel. Tools like Firebase Crashlytics give your team immediate visibility into crash rates, error patterns, and session data so you can identify and fix critical issues before they accumulate into negative reviews. Setting up alerting thresholds before launch day means your team gets notified automatically when something breaks rather than finding out from a user complaint.
Analytics data from your first weeks of live usage also tells you which features users engage with and which ones they abandon. That behavioral data directly shapes your update roadmap, giving you evidence-based priorities instead of internal opinions. Shipping regular, incremental updates signals to both users and app stores that your product is actively maintained, which affects discoverability and user retention in ways that launch-day quality alone cannot sustain.
Next steps
Now you have a complete picture of the mobile app development lifecycle, from the research that validates your concept through the monitoring habits that keep your product healthy after launch. Each phase builds directly on the last, and skipping any one of them pushes the consequences into a later stage where fixing them costs significantly more time and budget.
The question is what you do with that knowledge. Whether you’re starting from scratch or taking over a project that lost momentum, having an experienced development partner makes a measurable difference in how efficiently you move through each phase and how many costly mistakes you avoid along the way. Your app deserves a team that has navigated this process before and knows exactly where the risks concentrate.
Ready to move forward? Talk to our team at Tetra Technology about your app concept. We’ll help you plan and execute every phase, from initial requirements through launch and beyond.